Java VisualVM is a tool that provides a visual interface for viewing detailed information about Java technology-based applications (Java applications) while they are running on a Java Virtual Machine (JVM). Java VisualVM organizes JVM data that is retrieved by the Java Development Kit (JDK) tools and presents the information in a way that enables you to quickly view data on multiple Java applications. You can view data on local applications and applications that are running on remote hosts. You can also capture data about the JVM software and save the data to your local system, and view the data later or share the data with others.
In order to benefit from all Java VisualVM's features, you should run the Java Platform, Standard Edition (Java SE) version 6.
Java VisualVM is bundled with JDK version 6 update 7 or greater. Once you have installed an appropriate JDK version, navigate to your JDK software's bin directory and double-click the Java VisualVM executable. On Windows this directory will be the following:
C:\Program Files\Java\jdk1.6.0_update-number\bin
Alternatively, navigate to your JDK software's bin directory and type the following command at the command (shell) prompt:
jvisualvm
The first time that you launch Java VisualVM you are prompted to accept a license agreement.
On Windows, the default location for the Java VisualVM userdir is the following:
C:\Documents and Settings\<USER>\Application Data\.visualvm\JDK_update-number
To find the location of your Java VisualVM userdir, choose Help > About from the main menu and click Details in the About Java VisualVM window.
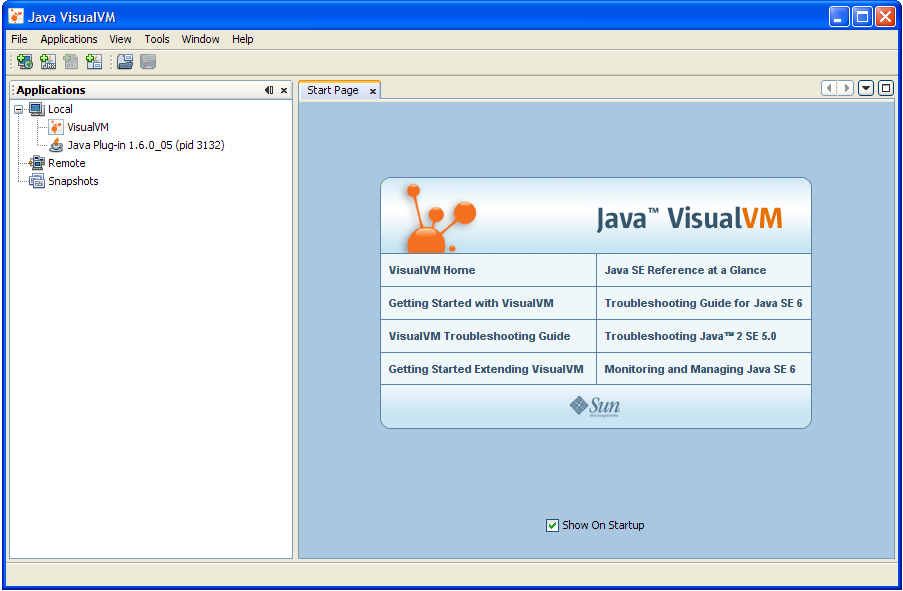
When you start Java VisualVM, the main Java VisualVM window opens. The main Java VisualVM window is divided into two windows.

When you first start Java VisualVM, the Applications window is
visible in the left side of the window and the Start Page is
visible in the right side in the main window. The Start Page
contains links to Java VisualVM documentation web pages and
additional resources.
Note: The Start Page opens by default each time you start
Java VisualVM. You can open the Start Page at any time by choosing
Help > Start Page from the main menu. You can also hide the
Start page by unchecking the "Show On Startup"
check-box.
The Applications window opens in the left side of the main Java VisualVM window when you launch the application. The Applications window is the main point of entry for exploring the details of running applications. The Applications window uses a tree structure to enable you to quickly view the applications running on the local machine and any connected remote machines. You can also access core dumps (Solaris/Linux) and saved snapshots from the Applications window.
Right-clicking a node in the Applications window opens a popup menu that enables you to perform actions related to that node, including opening application tabs, taking heap and thread dumps and opening snapshots in the main window.
For more details about how to use the Applications window to view and save data, see the following pages:
Detailed information about applications is displayed in the main window. When you view data about an application, each application is represented by a tab in the main window that enables you to easily view and navigate the data. Saved thread dumps and heap dumps are also opened in the main window.
For information about the application data that can be displayed in the main window, see the following pages:
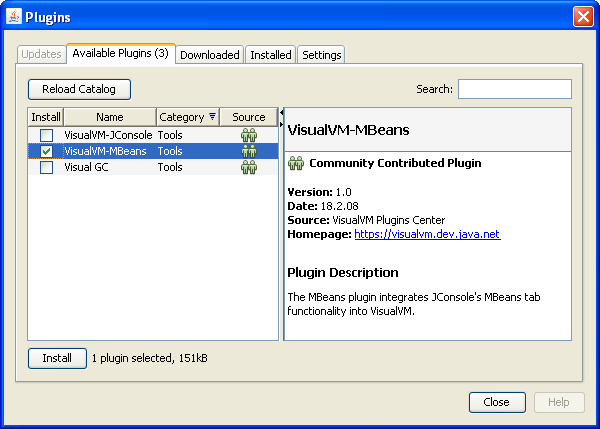
You can add functionality to Java VisualVM by using the Plugins manager to install plugins from the Java VisualVM Plugins Center. You can also extend the functionality of Java VisualVM by developing your own plugins that can then be added to an update center.
For example, installing the Java VisualVM-MBeans plugin adds an MBeans tab to the application tab that enables you to monitor and manage MBeans from within Java VisualVM.
To install a Java VisualVM plugin:

For more information about creating Java VisualVM plugins, see the following documents: